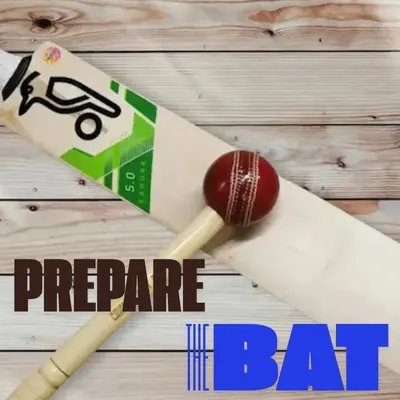
How to Use The Cricket Ball Mallets Correctly | For Optimal Performance
Published: 8 Nov 2024
When I compared the experience of using a cricket bat that had been carefully knocked in with one that hadn’t, the difference was clear.
A well-prepared bat has a smoother, more solid feel with every shot, while an unprepared bat often feels raw and risky. This is where the cricket ball mallet comes in—a simple but essential tool for any player serious about getting the best out of their bat.
What is a Cricket Ball Mallet?

A cricket ball mallet is a specially designed tool used to condition and prepare a new cricket bat before it’s ready to take on real play.
It typically has a short handle and a rounded, ball-shaped head, mimicking the weight and impact of an actual cricket ball. This shape and weight make it ideal for breaking in the fibers of the bat, a process known as “knocking in.”
Cricket bats are made of willow, a strong yet relatively soft wood that performs well under impact but needs preparation.
When a bat is brand new, the fibers in the willow are tightly packed and rigid. Striking the bat repeatedly with a mallet breaks down these fibers slightly, allowing them to flex and compress without cracking when they’re later hit by an actual cricket ball.
Without this preparation, the wood can be too stiff, and direct impacts from a ball can cause splits or cracks that shorten the life of the bat.
Think of knocking in as a way to extend the life of your bat and improve its performance. It doesn’t just prevent cracks; it also helps the bat gain a “sweet spot” where the ball will respond with better power and control. Simply put, knocking in your bat is one of the best things you can do to ensure it plays well season after season.
Know The Right Way to Use a Cricket Ball Mallet
Using a cricket ball mallet might seem straightforward, but there’s a technique to it if you want to do it right. Here’s a step-by-step guide to using your mallet for the best results:
- Start Slowly
Begin with gentle taps across the face and edges of the bat. This initial stage helps ease the willow into the knocking-in process without overwhelming it. - Cover the Entire Face
Gradually move across the full face of the bat, working your way from the center out toward the edges. Pay special attention to the edges, as these areas need conditioning to stand firm against the side hits. - Increase Pressure Gradually
As the bat begins to soften and respond to the mallet, increase the strength of your hits. However, don’t go too hard on the edges; instead, work these areas with softer, glancing blows to avoid damage. - Repeat for a Few Hours
Knocking in is a process that requires patience. Ideally, you should spend at least 3 to 4 hours over a few sessions to fully prepare your bat. - Test it Out
Once you’ve completed the initial knocking-in phase, test the bat out with a softball or throwdowns to gauge its response. You can always return to the mallet if it needs further conditioning.
Does a Mallet Worth the Time and the Effort?
Using a cricket ball mallet is a bit of a commitment, but it’s time well spent. This process not only enhances the durability of your bat but also optimizes its performance.
A bat that’s been knocked in properly will feel just right in your hands, capable of delivering the power and finesse you need on the field.

Much like wearing in a new pair of boots or breaking in a glove, knocking in a bat makes a noticeable difference in how it performs. It’s a ritual of care that helps you form a connection with your equipment, preparing it for those big moments on the field.
Final Thoughts
So if you’re investing in a cricket bat, don’t overlook the mallet. Take the time to knock it in—it’s one of the simplest ways to protect your investment and make sure that when you step up to the crease, your bat is just as ready as you are.

- Be Respectful
- Stay Relevant
- Stay Positive
- True Feedback
- Encourage Discussion
- Avoid Spamming
- No Fake News
- Don't Copy-Paste
- No Personal Attacks

- Be Respectful
- Stay Relevant
- Stay Positive
- True Feedback
- Encourage Discussion
- Avoid Spamming
- No Fake News
- Don't Copy-Paste
- No Personal Attacks


